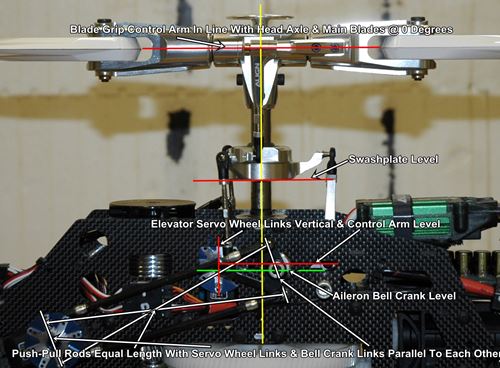
RC Helicopter Neutral Setup Procedure
This guide walks through setting an RC helicopter to its mechanical neutral: transmitter at zero pitch, servos centered, swashplate level, driver arms aligned, and blade grips at zero pitch.
1. Prepare the transmitter and model
- Power on the transmitter and select the correct model.
- Set all flight modes to a linear pitch curve for setup (e.g. 0-50-100).
- Set throttle hold ON so the motor cannot start.
- Verify subtrim and trim are zero on all cyclic and pitch channels.
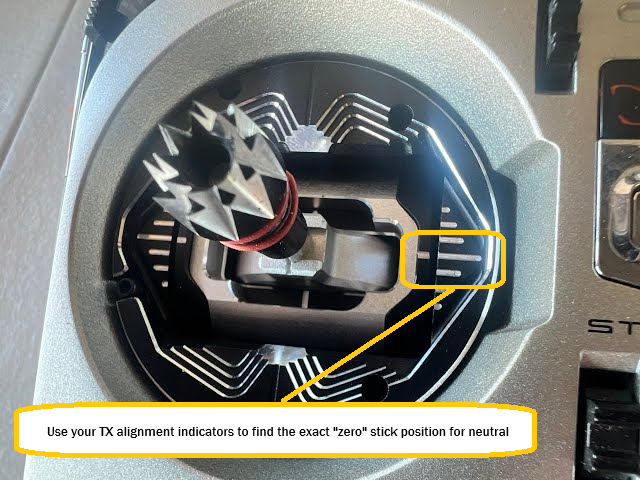
- Move the collective stick (left gimbal on most radios) to exact center (50%). <---- IMPORTANT!!!
2. Center/level the servo arms
With the collective stick at mid position, each servo should be at its electronic center.
- Power on the helicopter so the servos initialize.
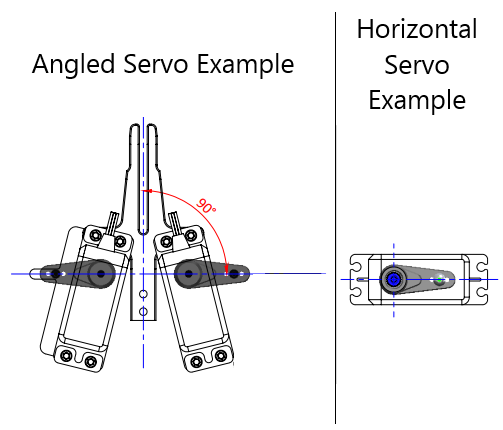
- Install each servo arm so it is as close to 90° to the servo case as possible.
- If needed, remove and re-index the arm on the spline to get it near 90°.
- Trim each horn to 0° in your flight controller servo trim page to fine-tune each arm to true center.
- Confirm all three cyclic servos are centered and move symmetrically with stick input.
3. Level the swashplate (X and Y axes)
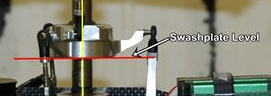
The swashplate must be level front-back (pitch axis) and left-right (roll axis) at mid stick.
- Ensure the collective stick is still at mid position.
- Use a swashplate leveler or visual reference against the main shaft.
- Adjust each servo-to-swash linkage length so the swash sits level left-right.
- Adjust front/rear linkage lengths so the swash is level front-back.
- Re-check: rotate the head slowly and confirm the swash stays level around the shaft.
4. Set the driver arms
NOTE: driver arms is the correct term as they drive the inner swashplate. Some people still call them, "mixing arms" or "washout arms" - That is incorrect - those were the flybar days guys. See this additional article to gain a better perspective -> https://www.rchelicopterfun.com/DFC.html
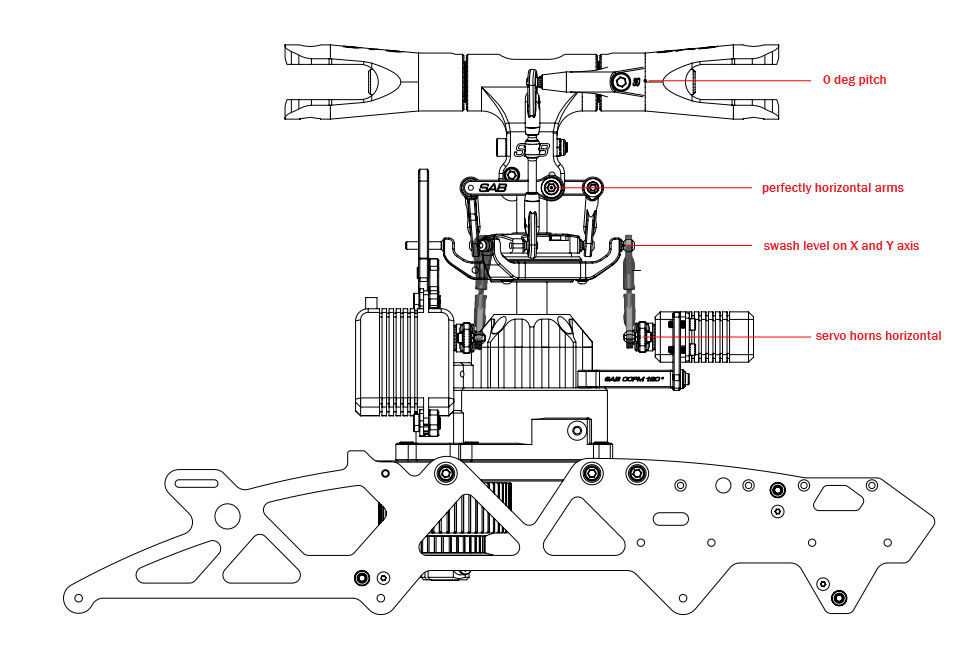
The driver arms that connect the swash to the head must be neutral at mid stick.
- With the swash level at mid stick, check the driver arms relative to the main shaft.
- Adjust the link lengths between swash and driver arms so the arms are horizontal or at the manufacturer's specified neutral angle.
- Verify both sides match: equal angle and equal distance from the head block.
- Move collective up and down and confirm smooth, symmetric motion with no binding.
5. Set blade grips to zero pitch
At mid stick, the main blades should have exactly zero collective pitch.
- Install the main blades and snug the blade bolts.
- Place a pitch gauge on one blade, aligned with the rotor disc.
- With collective at mid stick, read the pitch angle on the gauge.
- Adjust the linkage from driver arms to blade grips until the gauge reads 0°.
- Repeat for the other blade and confirm both are at 0° at mid stick.
- Move collective to full positive and full negative to verify total pitch range and symmetry (e.g. +12° / −12°).
6. Final checks
- Reconfirm transmitter trims and subtrims are correct and saved to the model.
- Verify swash remains level through the full collective range.
- Check for any mechanical binding or uneven travel in linkages.
- Perform a safe spool-up and hover test, making minor electronic adjustments (pitch curves, expo) as needed.
Once these steps are complete, your helicopter should be mechanically neutral and ready for pitch range check and PID tuning in flight.