ESC Telemetry Masterclass: Wiring, Protocols, EdgeTX Setup, and Custom LUA Automation
A comprehensive technical guide detailing how modern Electronic Speed Controllers (ESCs) transmit real-time telemetry metrics to RadioMaster and OpenTX/EdgeTX transmitters, why this feature transforms pilot safety, how signal protocols operate, and how to write custom LUA scripts to act automatically on live telemetry triggers.
1. What is ESC Telemetry and Why Is It Essential for Beginners?
Historically, pilots relied on mechanical timers mapped to their throttle stick to estimate remaining flight time. However, fixed timers cannot account for aggressive pitch pumps, ambient temperature drops, battery pack degradation, or unexpected headspeed changes.
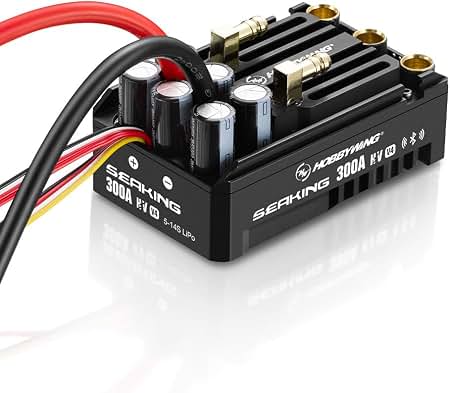
ESC Telemetry allows the Electronic Speed Controller to measure live physical data directly from its internal MOSFETs and current sense shunts, feeding these metrics back over the radio link directly to your RadioMaster transmitter screen or voice audio alerts.
Key Beginner Benefits:
- Preventing Over-Discharge: Receive real-time cell voltage and total capacity consumed in milliamp-hours (mAh), allowing you to land precisely when 80% of pack capacity is depleted rather than guessing based on a timer.
- Thermal Protection: Monitor internal ESC temperature in real time. A beginner hovering a fully faired scale fuselage or learning basic pitch pumps can be alerted to thermal saturation before destroying expensive ESC power stages.
- Headspeed Tracking: Motor RPM metrics allow beginners to verify governor loop performance without needing an external handheld optical tachometer.
- Early Mechanical Warning: Abnormally high continuous current draw (A) in a steady hover immediately signals mechanical binding, bad gear mesh, tight belt tension, or failing motor bearings.
2. Hardware Wiring and Telemetry Signal Architecture
An ESC requiring telemetry feedback relies on two separate signal paths running to your Flight Controller (FC) or receiver:
- Throttle Signal Wire (PWM / DShot): A unidirectional wire carrying control commands from the receiver/FC to the ESC.
- Telemetry Output Wire: A dedicated single signal wire (often yellow, blue, or white) running from the ESC's auxiliary telemetry port to a hardware RX UART pad on your flight controller (such as a Rotorflight or Betaflight board) or directly into a telemetry-capable receiver port.
3. Signal Protocols: How the Telemetry Wire Functions
The signal wire carries high-speed digital asynchronous serial communication. Depending on the brand of ESC and flight software, several protocols govern this single wire:
| Protocol | Baud Rate / Nature | Common ESC Ecosystems | Description |
|---|---|---|---|
| KISS / Auto-Telemetry | 115,200 baud, 8N1 Uninverted Serial | Flycolor, YGE, BLHeli_32, APD | Streams continuous binary data frames containing voltage, current, consumption, temperature, and RPM at fixed intervals without needing polling requests. |
| Hobbywing V4/V5 Protocol | 19,200 baud Serial | Hobbywing Platinum / FlyFun | Sends custom binary frames containing RPM, voltage, current, and MOSFET temperature. Requires decoding via FC software or dedicated telemetry converters. |
| Castle Creations Live | Pulse-Width Modulation / Serial | Castle Talon / Phoenix Edge | Uses high-frequency bit-banging down a single wire to stream telemetry packets to external receivers or flybarless units. |
| Hott / Futaba / Jeti Telemetry | Bi-directional half-duplex serial | Scorpion Tribunus, Kontronik | Interactive bus protocols allowing both live telemetry reporting and active parameter configuration directly from the radio transmitter. |
Once the flight controller receives this raw serial stream, it packages the metrics into standard CRSF (Crossfire) or FrSky S.Port telemetry frames and passes them wirelessly to your RadioMaster transmitter over your ExpressLRS or Multi-Protocol radio link.
4. Discovering and Configuring Telemetry Metrics on RadioMaster (EdgeTX)
-
Step 1: Power the System & Establish Link
Power up your RadioMaster transmitter first, then connect the flight battery to your model. Ensure your radio link shows solid connection status.
-
Step 2: Access the Telemetry Menu
Press the MODEL button on your RadioMaster, page over to the TELEMETRY screen, and scroll down to the sensor list.
-
Step 3: Execute "Discover New Sensors"
Highlight and click Discover New Sensors. Within 2–3 seconds, your transmitter will discover populating metrics sent from the ESC loop:
Capa— Consumed capacity in milliamp-hours (mAh).Curr— Real-time current draw in Amperes (A).VBat/RxBt— Live main battery pack voltage.EscT/Temp— Real-time ESC MOSFET temperature (°C).RPM— Motor or main rotor rotational speed.
Click Stop Discover Sensors once the list stabilizes to save processor cycles.
-
Step 4: Configure Voltage & Capacity Alarms
Page over to Logical Switches and Special Functions in EdgeTX to set automated voice prompts (e.g., "Battery Low" when
Capaexceeds 3,800 mAh on a 5,000 mAh pack, or "ESC Overheating" whenEscTexceeds 85°C).
5. Automating Safety with Custom LUA Scripts
EdgeTX and OpenTX radios allow pilots to run background LUA scripts. Instead of simple static alarms, a custom LUA script continuously evaluates incoming ESC telemetry and executes advanced programmatic decisions (such as triggering haptic feedback, announcing dynamic warnings, or forcing automated audio calls during critical thermal spikes).
Sample LUA Background Script: ESC Thermal & Consumption Monitor
Save the following script as esc_mon.lua in your transmitter's /SCRIPTS/FUNCTIONS/ directory and assign it to run as a Special Function (Background / LUA Script):
-- EdgeTX / OpenTX LUA Script for Active ESC Telemetry Monitoring
          -- File: /SCRIPTS/FUNCTIONS/esc_mon.lua

          local function run()
            -- Fetch Telemetry Sensor Field IDs
            local tempSensorId = getFieldInfo('EscT') and getFieldInfo('EscT').id
            local capaSensorId = getFieldInfo('Capa') and getFieldInfo('Capa').id

            -- Verify sensors exist before reading
            if tempSensorId and capaSensorId then
              local escTemp = getValue(tempSensorId)   -- Temperature in Celsius
              local mahUsed = getValue(capaSensorId)   -- Capacity in mAh

              -- THRESHOLD 1: ESC Thermal Safety Overwrite (e.g., > 90°C)
              if escTemp > 90 then
                -- Play critical audio alert and vibrate transmitter
                playFile("/SOUNDS/en/esc_hot.wav")
                playHaptic(25, 5, 2) -- Duration, pause, repeat count
              end

              -- THRESHOLD 2: Capacity Consumption Alert (e.g., > 4000 mAh consumed)
              if mahUsed > 4000 then
                playFile("/SOUNDS/en/land_now.wav")
              end
            end
            return 0
          end

          return { run=run }
6. Summary
Connecting ESC telemetry via a single serial wire converts your RadioMaster transmitter into a powerful, real-time ground control station. By routing hardware UART data into EdgeTX sensor discovery and deploying custom LUA background scripts, pilots transition from blind timer-based flying to proactive, data-driven flight management.