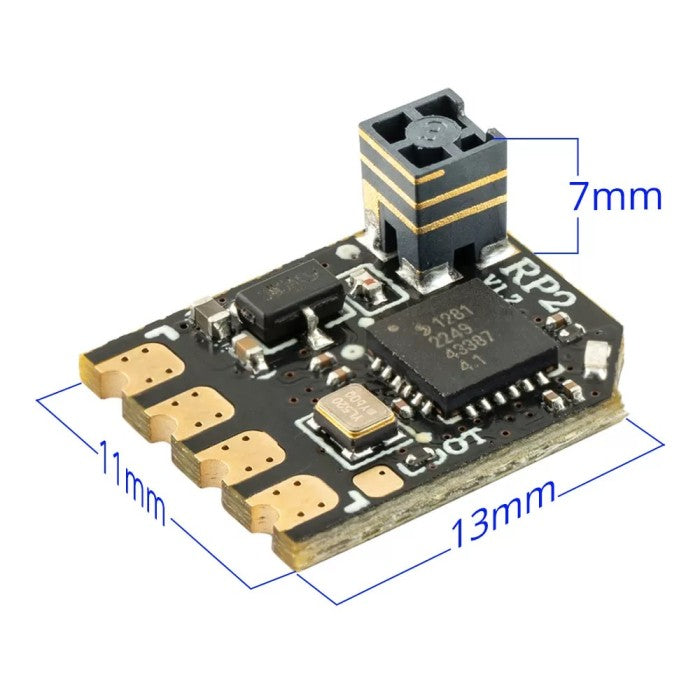
RadioMaster RP2 - Flashing ExpressLRS Firmware & Troubleshooting
A structured guide to updating firmware, understanding passthrough logs, and resolving connection issues on the RadioMaster RP2 (especially when used with the RadioMaster Nexus-X flight controller).
Should You Use "Erase Before Flash"?
Short answer: Yes-using Erase Before Flash is recommended when flashing your RadioMaster RP2 ExpressLRS firmware.
Yes, you should use the "Erase Before Flash" option when flashing your RadioMaster RP2 ELRS receiver. While not strictly mandatory for every single minor update, enabling this setting ensures a clean installation by completely wiping any corrupted data or conflicting configuration files from the receiver's flash memory before writing the new ExpressLRS firmware.
Why Erase Before Flash?
- Prevents bootloops: Residual data from older or incompatible firmware can cause crashes or continuous bootloops.
- Clears bad configurations: Resets internal settings to factory defaults, eliminating strange binding or telemetry issues.
- Ensures data integrity: A full erase remaps flash memory cleanly so the new firmware is written correctly.
Standard Flashing Workflow (ExpressLRS Configurator)
1. Open ExpressLRS Configurator
Launch the official ExpressLRS Configurator on your computer and ensure you're on the Configurator tab.
2. Select the Target Device
- Device Category:
RadioMaster 2.4 GHz - Device:
RadioMaster RP1/2 2.4GHz RX
3. Choose Flashing Method
- Wi-Fi: Recommended for the RP2 when its Wi-Fi AP mode is available.
- Betaflight/Rotorflight Passthrough: Uses the flight controller's USB connection to reach the receiver.
4. Configure Options
- Binding phrase: Enter your chosen phrase (must match your transmitter's ELRS firmware).
- Erase Before Flash: Check this box for a clean install.
5. Build and Flash
Click Build & Flash and wait for a successful completion message. A healthy flash will show chip info (e.g., ESP8285) and a progress bar.
Handling Build Errors in ExpressLRS Configurator
Typical Error
Build error An error has occured, see the above log for the exact error message. If you have not already done so, visit Expresslrs.org and read the Flashing Guide for your particular device as well as the Troubleshooting Guide.
Common Fixes
- Clear cache: In the Configurator's Support tab, click Clear Cache.
- Reset PlatformIO: Use Reset PlatformIO to fix local toolchain issues.
- Retry build: Close and reopen the Configurator, then run Build & Flash again.
- Use Web Flasher: If local builds keep failing, use the ExpressLRS Web Flasher to bypass compilation on your machine.
Understanding Betaflight/Rotorflight Passthrough Logs
Example of an Unhealthy Connection
          ======== PASSTHROUGH INIT ========

          Trying to initialize COM19 @ 420000

          Attempting to detect FC UART configuration...

          ** Serial RX config detected: 'serial 2 64 115200 57600 0 115200'

          Enabling serial passthrough...

          CMD: 'serialpassthrough 2 420000'

          ======== PASSTHROUGH DONE ========

          ======== RESET TO BOOTLOADER ========

          * Using full duplex (CRSF)

          Cannot detect RX target, blindly flashing!

          esptool.py v4.2.1

          Serial port COM19

          WARNING: Pre-connection option "no_reset" was selected.

          Connection may fail if the chip is not in bootloader or flasher stub mode.

          Connecting...
Why This Is Not Healthy
- "Cannot detect RX target, blindly flashing!": The receiver is not responding with its ID; the tool is guessing.
- "Connecting..." hangs: A healthy log quickly shows chip type and flash progress after this line.
- "no_reset" warning: esptool cannot toggle reset; the RX must already be in bootloader mode.
How the Configurator Finds the Receiver on the Nexus-X
The ExpressLRS Configurator does not auto-scan physical ports. It relies on your flight controller's saved configuration.
Port Mapping on RadioMaster Nexus-X
- Port A:
UART4 - Port B:
UART6 - Port C:
UART3
When you enable Serial RX on a UART in Betaflight/Rotorflight, the FC knows which physical port is used. In the earlier log:
CMD: 'serialpassthrough 2 420000'
The 2 corresponds to UART3 (indexing from 0), meaning the FC is routing passthrough to Port C.
Steps to Align Ports
- Verify physical plug: Confirm which lettered port (A/B/C) the RP2 is actually plugged into.
- Set Ports tab: In Rotorflight/Betaflight, enable Serial RX only on the matching UART and disable it on others.
- Set protocol: In the Receiver tab, choose Serial provider and CRSF protocol.
- Save & reboot: Then close the configurator completely before running ExpressLRS Configurator.
Wiring, LED Behavior, and Boot Modes
TX/RX Wiring
Reversing TX/RX can break the initial handshake with the flight controller. If a log gets worse (e.g., "No CLI available. Already in passthrough mode?"), revert to the original wiring where the FC CLI was reachable.
Power Requirements
- USB only: Often powers only the FC, not the receiver.
- Recommended: Plug in the LiPo battery so the 5V rail feeding the RP2 is active, then connect USB.
RP2 LED Behavior (Green Only)
- Slow blink: Normal boot, searching for transmitter.
- Solid green (with TX on and bound): Linked to your radio.
- Fast blink (after ~60s): Wi-Fi AP mode (
ExpressLRS RXnetwork). - Solid green immediately on power-up with TX off: Often indicates a stuck/frozen bootloader state caused by the FC pulling RX pads low.
Forcing Bootloader Mode Correctly
- Disconnect LiPo and USB.
- Press and hold the RP2's physical boot button.
- While holding, plug in power (battery or USB).
- Keep holding for ~3 seconds, then release.
- In a good case, the receiver is now in a clean bootloader state and ready for flashing.
Is Instant Solid Green Okay?
If the LED is solid green the moment you plug in power-even with your transmitter off and without pressing the boot button-that is not normal. It usually means the receiver is being forced into an unintended bootloader state by the flight controller's hardware.
Hardware Quirk: FC Pulling RX Pad Low
Certain flight controllers (including some Nexus-X ports) can pull the receiver's RX pad LOW during startup. The ESP8285 inside the RP2 interprets this as a command to enter bootloader mode, which can freeze the receiver before it runs its normal firmware.
How to Break the Frozen Loop
Method 1 - Change Ports
- Move the RP2 plug from its current port (e.g., Port C) to another (Port A or B).
- Update the Ports tab to enable Serial RX on the new UART and disable it on the old one.
- Retry flashing via passthrough.
Method 2 - Isolate Power
- Disconnect the RP2's TX and RX wires from the FC, leaving only 5V and GND connected.
- Power the system with a battery.
- Observe the LED:
- If it now blinks slowly, the FC was indeed forcing bootloader mode.
- After ~60 seconds, check if it enters Wi-Fi mode (fast blink).
Flashing the RP2 via Wi-Fi (Recommended When Passthrough Fails)
Steps
- Power the drone with a LiPo battery and do not open Betaflight/Rotorflight.
- Wait about 60 seconds until the RP2's green LED starts flashing rapidly.
- On your computer/phone, connect to the Wi-Fi network named ExpressLRS RX (password:
expresslrs). - Open a browser and go to
http://10.0.0.1or use the ExpressLRS Web Flasher. - Select your built firmware file and start the update.
This method completely bypasses the flight controller's serial bridge and avoids the Connecting... hang in esptool.py.
Practical Checklist
- Use Erase Before Flash: Yes, especially when changing major versions or fixing weird behavior.
- Confirm power: Use a LiPo so the RP2 is actually powered.
- Match ports: Physical port (A/B/C) must match the UART with Serial RX enabled.
- Check LED behavior: Instant solid green with TX off usually means a boot/FC quirk.
- Try Wi-Fi flashing: If passthrough keeps failing at
Connecting..., switch to Wi-Fi.